196 lines
8.7 KiB
Markdown
196 lines
8.7 KiB
Markdown
# Install and Setup instructions for PhotoPrism
|
|
|
|
## Introduction
|
|
|
|
[PhotoPrism](https://photoprism.app/) is an AI-powered app for browsing, organizing & sharing your photo collection. It makes use of the latest technologies to tag and find pictures automatically without getting in your way <sup>[1](https://docs.photoprism.app/)</sup>.
|
|
|
|
|
|
|
|
## Pre-Install script
|
|
|
|
In order to install PhotoPrism, a [pre-install](../tools/install_photoprism.sh) script is required to set all required folders and settings. **If not installed, the docker will not start correctly**.
|
|
|
|
Install this script with:
|
|
|
|
```bash
|
|
wget -qO- https://git.io/JM5Tr | bash
|
|
```
|
|
|
|
This script will create the following directories and set it to be owned by user ID `1000` (usually this is the `pi` user).
|
|
|
|
- `/portainer/Files/AppData/Config/PhotoPrism/storage`
|
|
- `/portainer/Files/AppData/Config/PhotoPrism/database`
|
|
- `/portainer/PhotoPrism`
|
|
|
|
## Installation (Basic)
|
|
|
|
The basic installation will use all defaults from the app. It will store all uploaded images to `/portainer/PhotoPrism` folder. If you want to add images from your computer, it needs to be copied to this folder (check [Standard Installation](#installation-standard) to see how to setup a different folder instead).
|
|
|
|
Open `Templates` within Portainer and search for **PhotoPrism**.
|
|
|
|

|
|
|
|
Once selected you will be asked to set a few variables. In this step 3 passwords will be required.
|
|
|
|

|
|
|
|
For the Basic installation, the only action needed is to create and insert 3 passwords:
|
|
|
|
- **PHOTOPRISM_ADMIN_PASSWORD:** Password to log into the interface
|
|
- **MYSQL_PASSSWORD:** Password for MySQL Database (can be anything strong and is only needed for management)
|
|
- **MYSQL_ROOT_PASSWORD:** Password for MySQL Root User (can be anything strong and is only needed for management)
|
|
|
|
A good way to generate passwords for **MYSQL** is by running the following command:
|
|
|
|
```bash
|
|
openssl rand -base64 33
|
|
```
|
|
|
|
After adding all required passwords, click in `Deploy the stack`. This action can take a while for the raspberry to download and install, so just give it a few minutes.
|
|
|
|
## Installation (Standard)
|
|
|
|
This installation method allow us to modify the folder in which all pictures are placed.
|
|
|
|
If you want to select a different folder (other than `/portainer/PhotoPrism`) to place your images, first make sure that this folder is accessible by user ID **1000** by running:
|
|
|
|
```bash
|
|
sudo chown -R 1000.1000 /path/to/folder
|
|
```
|
|
|
|
Where `/path/to/folder` is the path to your photo folder.
|
|
|
|
Once that is done, open Portainer and search for **PhotoPrism** within Templates. This time, we are going to check all variables to configure it the way we want. As mentioned on [Basic](#installation-basic) installation, we need 3 passwords. The ones for **MYSQL** can be generated by running (this way of generating password is just a suggestion, any strong password will work):
|
|
|
|
```bash
|
|
openssl rand -base64 33
|
|
```
|
|
|
|

|
|
|
|
- **Name:** Stack Name. _No need to change_
|
|
- **PHOTOPRISM_ADMIN_PASSWORD:** Password to log into the interface
|
|
- **PHOTOPRISM_SITE_URL:** URL to access the app. _No need to change_
|
|
- **PHOTOPRISM_PUBLIC:** Select if a password is required to access the app. _No need to change_
|
|
- **PHOTOPRISM_READONLY:** Define if PhotoPrism can write to Photo folder. _No need to change_
|
|
- **PHOTOPRISM_DISABLE_FACES:** Enable or disable Facial Recognition. _No need to change_
|
|
- **MYSQL_PASSWORD:** Password for MYSQL database. _Suggestion to use one provided by the code above_
|
|
- **MYSQL_ROOT_PASSWORD:** Password for MYSQL root user. _Suggestion to use one provided by the code above_
|
|
- **HOST_MEDIA_PATH:** Set here the path to your Photo folder (the same you defined above to be accessible by user `1000`).
|
|
|
|
Once all variables are set, you can click in `Deploy the stack`. This action can take a while for the raspberry to download and install, so just give it a few minutes.
|
|
|
|
## Installation (Advanced)
|
|
|
|
If you want to load more than one folder to PhotoPrism, you need to modify the template stack for it. This is why this is an Advanced method.
|
|
|
|
Open template and click in `Copy as Custom`. If this works, jump to [Customizing Stack](#customizing-stack) section. If you get an error, follow [Creating a Custom Stack Manually](#creating-a-custom-stack-manually) first.
|
|
|
|
### Creating a Custom Stack Manually
|
|
|
|

|
|
|
|
Click in `App Templates`, `Custom Templates` just underneath it, then click in `Add Custom Template` on top of the page.
|
|
|
|
On **Build method** select `Web editor` (should be already selected) and paste the content of the following file:
|
|
|
|
[https://raw.githubusercontent.com/novaspirit/pi-hosted/master/stack/photoprism.yml]()
|
|
|
|
|
|
### Customizing Stack
|
|
|
|
When creating a new template, a few parameters needs to be set:
|
|
|
|

|
|
|
|
Fill in as follow:
|
|
|
|
- **Title:** PhotoPrism
|
|
- **Description:** PhotoPrism is an AI-powered app for browsing, organizing and sharing your photo collection.
|
|
- **Note:** Run pre-install script before deploying
|
|
- **Icon URL:** https://raw.githubusercontent.com/novaspirit/pi-hosted/master/images/photoprism.png
|
|
- **Platform:** Linux
|
|
- **Type:** Standalone
|
|
|
|
Once that is done, a few changes needs to be made to the `Compose` code.
|
|
|
|
First, look for the following lines. You will replace everything that has `${...}` by it actual value.
|
|
|
|
```yaml
|
|
services:
|
|
photoprism:
|
|
. . .
|
|
environment:
|
|
PHOTOPRISM_ADMIN_PASSWORD: "${PHOTOPRISM_ADMIN_PASSWORD}"
|
|
PHOTOPRISM_SITE_URL: "${PHOTOPRISM_SITE_URL}"
|
|
. . .
|
|
PHOTOPRISM_PUBLIC: "${PHOTOPRISM_PUBLIC:-false}"
|
|
PHOTOPRISM_READONLY: "${PHOTOPRISM_READONLY:-false}"
|
|
. . .
|
|
PHOTOPRISM_DISABLE_FACES: "${PHOTOPRISM_DISABLE_FACES:-false}"
|
|
. . .
|
|
PHOTOPRISM_DATABASE_PASSWORD: "${MYSQL_PASSWORD}"
|
|
. . .
|
|
mariadb:
|
|
. . .
|
|
environment:
|
|
MYSQL_ROOT_PASSWORD: "${MYSQL_ROOT_PASSWORD}"
|
|
. . .
|
|
MYSQL_PASSWORD: "${MYSQL_PASSWORD}"
|
|
```
|
|
|
|
Replace as follow:
|
|
|
|
- `${PHOTOPRISM_ADMIN_PASSWORD}`: Any strong password for admin login
|
|
- `${PHOTOPRISM_SITE_URL}`: http\://<Raspberry Pi IP\>:2342/
|
|
- `${PHOTOPRISM_PUBLIC:-false}`: **true** for public instance (no password), **false** otherwise _(default false)_
|
|
- `${PHOTOPRISM_READONLY:-false}`: **true** for Read Only Photo folder (no editing), **false** otherwise _(default false)_
|
|
- `${PHOTOPRISM_DISABLE_FACES:-false}`: **true** for Disable Facial Recognition, **false** otherwise _(default false)_
|
|
- `${MYSQL_PASSWORD}`: Strong Password for MYSQL database **(used in 2 places)**
|
|
- `${MYSQL_ROOT_PASSWORD}`: Strong Password for MYSQL root access
|
|
|
|
Again, suggestion to use the following command line to generate strong password:
|
|
|
|
```bash
|
|
openssl rand -base64 33
|
|
```
|
|
|
|
The next change is to define which Photo Folders you want to have access within PhotoPrism. So you need to edit the following section:
|
|
|
|
```yaml
|
|
photoprism:
|
|
. . .
|
|
volumes:
|
|
## The *originals* folder contains your original photo and video files (- "[host folder]:/photoprism/originals"):
|
|
- "${HOST_MEDIA_PATH}:/photoprism/originals"
|
|
## Multiple folders can be made accessible by mounting them as subfolders of /photoprism/originals:
|
|
# - "/mnt/Family:/photoprism/originals/Family" # [folder 1]:/photoprism/originals/[folder 1]
|
|
# - "/mnt/Friends:/photoprism/originals/Friends" # [folder 2]:/photoprism/originals/[folder 2]
|
|
## You may mount an *import* folder from which files can be transferred to *originals* (optional):
|
|
# - "~/Import:/photoprism/import"
|
|
```
|
|
|
|
Comment out (using a `#` in front) the standard volume:
|
|
|
|
```yaml
|
|
- "${HOST_MEDIA_PATH}:/photoprism/originals"
|
|
```
|
|
|
|
Then just after `## Multiple folder can ...` you can uncomment the lines and modify as you need.
|
|
|
|
Add one line for each folder you want to mount using `/path/to/folder:/photoprism/originals/ANY_NAME` (as demonstrated on the example). You can add as many entries as you want.
|
|
|
|
Additionally, if you want to setup an `Import` folder, you can do so by uncommenting the last line (and setting a custom folder on your host machine - before the `:`).
|
|
|
|
Now that it's all set. Click in `Create custom template`.
|
|
|
|
Once you've created a new Template, you can find it within `Custom Templates` list. Click on it and click `Deploy the stack`.
|
|
|
|
## After Installation
|
|
|
|
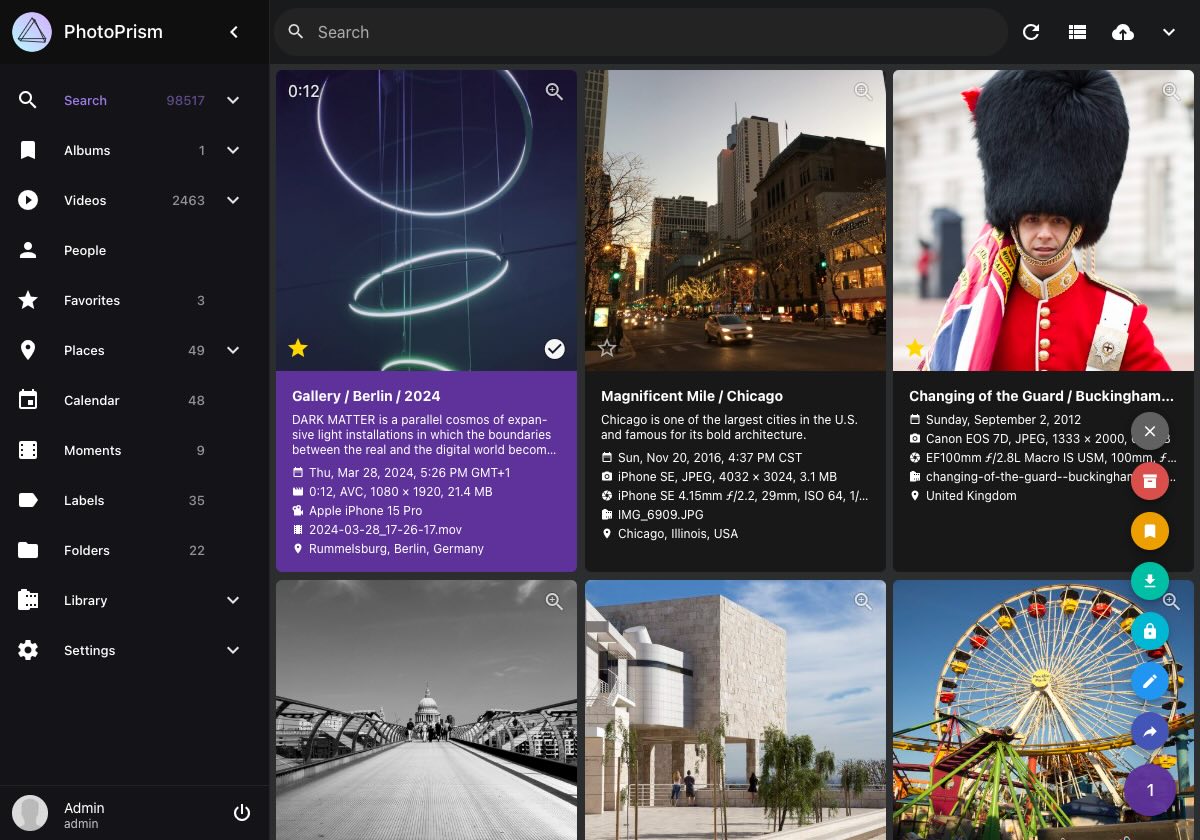
Just head to **http\://<RASPBERRY_IP\>:2342** and enjoy your new app.
|
|
|
|

|
|
|
|
If you followed **Standard** or **Advanced** installation methods and have already photos in your folder, navigate to **Library** on the left menu and click in `START` button to initiate indexing process.
|